What You Think You Know vs Reality
Most programmers think shaders are "programs that color pixels." This is like saying novels are "books with words." Technically true, but missing the essence.
A shader is a parallel function executed simultaneously across thousands of GPU cores. Each execution is independent - no shared state, no communication between pixels. This constraint is both the limitation and the superpower of shader programming.
But here's what changes everything for SwiftUI developers: you don't need to understand GPU architecture, render pipelines, or memory management. SwiftUI gives you a direct path from idea to visual effect.
The Full Picture You're Not Getting
In real GPU programming, there are multiple shader stages:
- Vertex Shaders: Transform 3D geometry (positions, normals)
- Fragment Shaders: Calculate pixel colors
- Geometry Shaders: Create new geometry
- Compute Shaders: General GPU computation
Here's what changes everything: SwiftUI only gives you access to fragment shaders, and even then, only through three specific filters. But here's the liberating truth: this is exactly what you need.
SwiftUI's shader integration:
.colorEffect: Pure color manipulation (close to fragment shaders).distortionEffect: Warps 2D coordinates.layerEffect: Samples textures (complex image processing)
This is like having a professional camera with three perfect lenses instead of a confusing cabinet full of equipment you don't understand.
Why This Course Uses SwiftUI's Approach
I could teach you "real" Metal with vertex shaders and render pipelines. But then you'd need:
- Complex Metal setup code
- Understanding of render passes
- Memory management
- CPU/GPU synchronization
- Platform-specific optimizations
Instead, we'll master what SwiftUI provides. It's constrained, but it's also:
- Immediately usable in your apps today
- Zero boilerplate - write the effect, see the result
- Naturally integrated with SwiftUI's animation system
- Still genuinely powerful for visual effects
Every example in this course works in real SwiftUI apps.
Concept Introduction: The SwiftUI Shader Model
When you write:
Text("Hello World")
    .colorEffect(ShaderLibrary.myShader(.float(brightness)))
Here's what actually happens:
- SwiftUI renders the text to a texture
- For each pixel, your shader receives:
- The pixel's position in the view
- The pixel's current color
- The view's size
- Your custom parameters
- Your shader returns a new color
- SwiftUI composites the result
You never see the vertex shader that positions the text - SwiftUI handles everything except the color computation.
Mathematical Foundation: The Shader Mental Model
Imagine you're managing a factory with 2 million workers (pixels). Each worker:
- Knows only their position on the assembly line
- Cannot talk to other workers
- Must produce exactly one color
- Works at exactly the same speed as everyone else
Your job as a shader programmer is to write one set of instructions that every worker follows, yet produces a coherent image when combined.
This is why you can create a ripple effect across an entire image, but you can't make one pixel "look at" another pixel's color directly.
Understanding Color and Coordinates
Color as Numbers
Colors aren't "red" or "blue" - they're vectors:
- RGB: Three components from 0.0 to 1.0
(1, 0, 0)= Pure red(0.5, 0.5, 0.5)= Medium gray(0, 0, 0)= Black
Position as Input
Each pixel has a position:
- x: Horizontal position (left to right)
- y: Vertical position (top to bottom, Metal uses top-left origin)
- Always in pixel coordinates (not normalized)
The Output Format
Every shader must return a color:
half4orfloat4: (red, green, blue, alpha)- Alpha = opacity (1.0 = opaque, 0.0 = transparent)
SwiftUI Integration Patterns
Parameter Passing
struct MyShader: View {
    @State private var brightness: Float = 1.0

    var body: some View {
        Image("photo")
            .colorEffect(ShaderLibrary.brighten(.float(brightness)))
    }
}
Animation Integration
struct AnimatedShader: View {
    @State private var phase: Float = 0.0

    var body: some View {
        Rectangle()
            .colorEffect(ShaderLibrary.wave(.float(phase)))
            .onAppear {
                withAnimation(.linear(duration: 2.0).repeatForever(autoreverses: false)) {
                    phase = 1.0
                }
            }
    }
}
Data Passing from SwiftUI to Metal
SwiftUI provides several mechanisms for passing data to Metal shaders. Understanding these approaches is crucial as we'll be using them throughout this course to create increasingly complex effects.
Supported Data Types
SwiftUI's Shader.Argument types map directly to Metal shader parameters:
// SwiftUI → Metal Parameter Types
.float<T>(T)                    // → float
.float2(CGPoint)                // → float2 (from point.x, point.y)
.float2<T>(T, T)               // → float2
.float3<T>(T, T, T)            // → float3
.float4<T>(T, T, T, T)         // → float4
.color(Color)                   // → half4 (premultiplied in target color space)
.colorArray([Color])            // → device const half4 *ptr, int count
.image(Image)                   // → texture2d<half> (one per shader limit)
.floatArray([Float])            // → device const float *ptr, int count
.data(Data)                     // → device const void *ptr, int size_in_bytes
.boundingRect                   // → float4 (automatically provided by SwiftUI) as float4(x, y, width, height)
Array Data Passing
For complex effects requiring multiple data points, SwiftUI supports array passing through .floatArray():
// SwiftUI Side - Multiple touch points
let touchPoints: [Float] = [
    Float(touch1.x), Float(touch1.y),
    Float(touch2.x), Float(touch2.y),
    Float(touch3.x), Float(touch3.y)
]

Rectangle()
    .colorEffect(ShaderLibrary.multiTouchRipple(.floatArray(touchPoints)))
// Metal Side - Receiving array data
[[stitchable]] half4 multiTouchRipple(
    float2 position,
    half4 color,
    device const float *touchPoints,
    int count
) {
    for (int i = 0; i < count; i += 2) {
        float2 touchPos = float2(touchPoints[i], touchPoints[i + 1]);
        // Process each touch point...
    }
    return color;
}
Alternative Data Passing Approaches
When SwiftUI's parameter types aren't sufficient, you can use texture-based data passing or custom MTKView wrappers for full Metal API access. These advanced techniques will be covered in later chapters when we build more complex effects.
Parameter Limitations
Be aware that SwiftUI has undocumented parameter limits. Shaders may fail silently when too many parameters are passed. Throughout this course, we'll learn strategies to work within these constraints while still creating sophisticated effects.
Your First Shader
Now that you understand the SwiftUI-Metal bridge, let's write your first shader. This simple example will demonstrate the core concepts in action.
Create a new Metal file (Shaders.metal) in your Xcode project:
#include <metal_stdlib>
using namespace metal;

[[ stitchable ]] half4 solidRed(float2 position, half4 color) {
    return half4(1.0, 0.0, 0.0, 1.0);
}
Then in SwiftUI:
Rectangle()
    .colorEffect(ShaderLibrary.solidRed())
Breaking Down the Code
-
Headers and Namespace
#include <metal_stdlib>
using namespace metal;
Required boilerplate for Metal's standard library.
-
Function Signature
[[ stitchable ]] half4 solidRed(float2 position, half4 color)[[ stitchable ]]: SwiftUI-specific attributehalf4: Return type (red, green, blue, alpha)position: Current pixel coordinatecolor: Input color from SwiftUI
-
The Return
return half4(1.0, 0.0, 0.0, 1.0);Pure red for every pixel, regardless of input.
Making It Interactive
[[ stitchable ]] half4 adjustableBrightness(
    float2 position,
    half4 color,
    float brightness
) {
    return half4(color.rgb * brightness, color.a);
}
struct InteractiveShader: View {
    @State private var brightness: Float = 0.5
    var body: some View {
        Image("sample")
            .colorEffect(ShaderLibrary.adjustableBrightness(.float(brightness)))
            .overlay(alignment: .bottom) {
                Slider(value: $brightness, in: 0...1)
                    .padding()
            }
    }
}
Common Pitfalls
Pitfall 1: Thinking Sequentially
// WRONG MENTAL MODEL
half4 badShader(float2 position, half4 color) {
    if (position.x == 0) {
        // "First, color the left edge..."
    }
    // NO! Every pixel executes simultaneously
}
Pitfall 2: Color Range Confusion
// WRONG - Using 0-255 range
return half4(255, 0, 0, 1);

// CORRECT - Using 0-1 range
return half4(1.0, 0.0, 0.0, 1.0);
Pitfall 3: Ignoring Alpha
// Might appear transparent or not render
return half4(1.0, 0.0, 0.0, 0.0);  // Alpha = 0!

// Usually want to preserve original alpha
return half4(newColor.rgb, color.a);
Pitfall 4: SwiftUI Parameter Mismatches
// WRONG - Type mismatch
.colorEffect(ShaderLibrary.myShader(.float2(size)))  // Shader expects a float, compile won't complain and will still compile

// CORRECT - Match types exactly
.colorEffect(ShaderLibrary.myShader(.float(brightness)))
Visual Explanation: Function Mapping
Think of your shader as a mathematical function:
f(position, color, parameters) → new_color

For solidRed:
f((0, 0), any_color, no_params) → (1, 0, 0, 1)
f((100, 200), any_color, no_params) → (1, 0, 0, 1)
f(anywhere, anything, nothing) → red
Every position-color combination maps to the same red output.
What We're Building Toward
By the end of this course, you'll create effects like:
- Holographic materials that respond to device rotation
- Particle systems controlled by touch gestures
- Dynamic backgrounds that adapt to content
- Custom transitions impossible with Core Animation
- Real-time image filters with live parameter adjustment
All integrated seamlessly with SwiftUI's declarative approach.
Challenges
Challenge 1: Basic Colors with SwiftUI
 Create a SwiftUI view with three buttons that apply different solid color shaders:
- Red button applies
solidRedshader - Green button applies
solidGreenshader - Blue button applies
solidBlueshader
Test on a Rectangle() or Text("Hello").
Challenge 2: Interactive Brightness
 Create
 brightnessControl shader that takes a brightness parameter.
Build a SwiftUI interface with:
- An image view
- A slider controlling brightness (0.0 to 1.0)
- Real-time shader parameter updates
Challenge 3: Color Channel Isolation
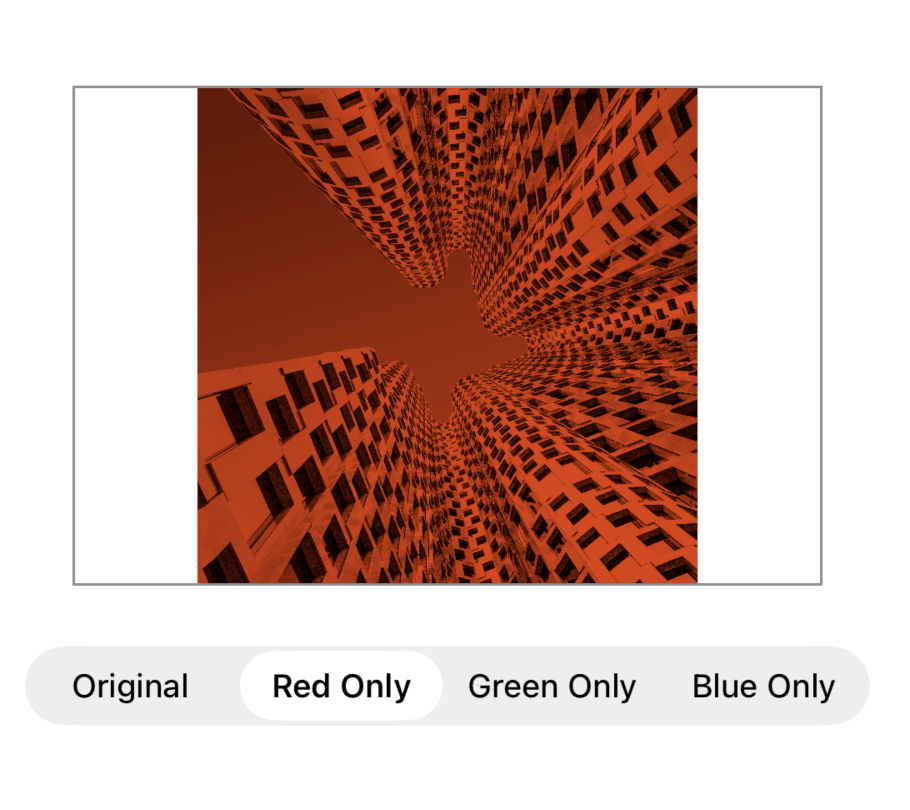 Create three shaders:
redChannel: Shows only red component, others = 0greenChannel: Shows only green componentblueChannel: Shows only blue component
Build a SwiftUI interface with buttons to switch between them on the same image.
Challenge 4: Simple Flag Creator
 Create shaders for flag colors and a SwiftUI interface to combine them:
- France: Blue
(0, 0.3, 0.6), White(1, 1, 1), Red(1, 0, 0) - Use
HStackwith three rectangles, each with different color shader - Add ColorPicker to customize each stripe color
Hint: You'll need separate shaders for each customizable color.
Challenge 5: Animated Pulse
 Create
 pulsingColor shader that:
- Takes a time parameter
- Uses
sin(time)to pulse between two colors - Integrate with SwiftUI animation using
TimelineView
TimelineView(.animation) { timeline in
    Rectangle()
        .colorEffect(ShaderLibrary.pulsingColor(.float(timeline.date.timeIntervalSinceReferenceDate)))
}
Want the Challenges Solutions?
Get the full Xcode project with solutions to all challenges, bonus examples, and clean, runnable code.
Get the Full Project →Validation Questions
Before proceeding to Chapter 2:
- Why does a shader return
half4instead ofhalf3?
Because colors need an alpha channel for opacity. half4 represents (red, green, blue, alpha) where alpha controls transparency (1.0 = opaque, 0.0 = transparent).
- What happens if you return
half4(1, 1, 1, 0.5)?
You get white color at 50% opacity (semi-transparent white).
- Why can't one pixel ask another pixel what color it is?
Because shaders execute in parallel across thousands of GPU cores with no shared state or communication between pixels. Each pixel execution is independent - this constraint is both the limitation and the superpower of shader programming.
- How do you pass a Float parameter from SwiftUI to a shader?
Use .float(value) in the shader call: .colorEffect(ShaderLibrary.myShader(.float(brightness)))
- What's the difference between
.colorEffectand.distortionEffect?
- .colorEffect: Pure color manipulation (90% of effects)
- .distortionEffect: Warps coordinates (ripples, magnification)
- Why use
half4instead offloat4for colors?
half4 uses 16-bit precision which is sufficient for color values (0.0-1.0 range) and more memory/bandwidth efficient on GPU, while float4 uses 32-bit precision which is overkill for color data.
Further Exploration
- Metal Performance Shaders: Apple's built-in shader library
- GPU Architecture: How SIMD execution works
- Color Spaces: sRGB vs linear color workflows
- SwiftUI Modifiers: How shader effects compose with other modifiers
Next Chapter Preview: You can fill the screen with solid colors and control them from SwiftUI. But every pixel is doing the same thing. Chapter 2 teaches you to use the position parameter to create gradients, patterns, and location-aware effects. You'll make pixels aware of where they are and create your first spatially-varying effects.