Your Current Understanding Is Incomplete
In Chapter 1, you learned that shaders receive a position parameter. You might think: "Position tells me where the pixel is, so I can use it to create patterns." This captures only part of the truth.
The real insight: Position is not just location - it's the fundamental input that drives everything in shader programming. Every effect, every pattern, every animation ultimately derives from transforming position into color.
But here's what no tutorial tells you: the position parameter you receive is almost never what you actually want to use. Raw pixel coordinates are like getting GPS coordinates when you need driving directions. Technically correct, but practically useless until transformed.
Concept Introduction: The Coordinate Transformation
The first line of almost every shader you'll ever write:
float2 uv = position / size;
This transforms pixel coordinates (0 to width, 0 to height) into UV coordinates (0 to 1, 0 to 1). UV coordinates are percentages - they tell you "how far across" and "how far down" you are, regardless of screen size.
Why this matters: A circle drawn with UV coordinates looks the same on iPhone and iPad. A circle drawn with pixel coordinates gets stretched and distorted.
Mathematical Foundation: UV Space
The Transformation
float2 uv = position / size;
// position: (400, 300) on 800x600 screen
// size: (800, 600)
// uv: (0.5, 0.5) - exactly center, always
UV Coordinate Properties
- (0, 0): Top-left corner
- (1, 1): Bottom-right corner
- (0.5, 0.5): Exact center
- Range: Always 0.0 to 1.0, regardless of screen size
Centered Coordinates
Often you want (0,0) at the center:
float2 uv = position / size;
float2 centered = uv - 0.5;  // Range: -0.5 to 0.5
// or
float2 centered = (uv - 0.5) * 2.0;  // Range: -1.0 to 1.0
Your First Pattern: Horizontal Gradient
Horizontal Gradient
A simple black-to-white gradient demonstrating how to use normalized coordinates
[[ stitchable ]] half4 horizontalGradient(float2 position, half4 color, float2 size) {
  float2 uv = position / size;
  return half4(uv.x, uv.x, uv.x, 1.0);
}What happens:
- Left edge:
uv.x = 0.0→ Black - Right edge:
uv.x = 1.0→ White - Center:
uv.x = 0.5→ Gray
Drawing Shapes with Distance
Circle Using Distance
Circle Using Distance
Creates a hard-edged circle using distance calculation
[[ stitchable ]] half4 circle(float2 position, half4 color, float2 size) {
  float2 uv = position / size;
  float2 center = uv - 0.5;  // Center at (0,0)

  float dist = length(center);  // Distance from center

  if (dist < 0.3) {
      return half4(1.0, 1.0, 1.0, 1.0);  // White inside
  } else {
      return half4(0.0, 0.0, 0.0, 1.0);  // Black outside
  }
}Smooth Circle with smoothstep
Smooth Circle with smoothstep
Creates a smooth-edged circle using smoothstep for anti-aliasing
[[ stitchable ]] half4 smoothCircle(float2 position, half4 color, float2 size) {
  float2 uv = position / size;
  float2 center = uv - 0.5;

  float dist = length(center);
  float circle = 1.0 - smoothstep(0.29, 0.31, dist);

  return half4(circle, circle, circle, 1.0);
}Key insight: smoothstep(0.29, 0.31, dist) creates a smooth transition between 0.29 and 0.31, eliminating jagged edges.
Pattern Creation
Grid Pattern
Grid Pattern
Creates an 8x8 grid pattern using fract() and line width detection
[[ stitchable ]] half4 gridPattern(float2 position, half4 color, float2 size) {
  float2 uv = position / size;

  // Create 8x8 grid
  float2 grid = fract(uv * 8.0);

  // Draw lines at grid boundaries
  float lineWidth = 0.1;
  float lines = 0.0;

  if (grid.x < lineWidth || grid.y < lineWidth) {
      lines = 1.0;
  }

  return half4(lines, lines, lines, 1.0);
}Radial Pattern
Radial Pattern
Creates concentric circles using sin() based on distance from center
[[ stitchable ]] half4 radialPattern(float2 position, half4 color, float2 size) {
  float2 uv = position / size;
  float2 center = uv - 0.5;

  float dist = length(center);
  float pattern = sin(dist * 20.0) * 0.5 + 0.5;

  return half4(pattern, pattern, pattern, 1.0);
}Common Pitfalls
Pitfall 1: Forgetting the UV Transform
// WRONG - Uses raw pixel coordinates
float2 center = position - size * 0.5;

// CORRECT - Transform to UV first
float2 uv = position / size;
float2 center = uv - 0.5;
Pitfall 2: Aspect Ratio Issues
// WRONG - Circles become ellipses on non-square screens
float dist = length(uv - 0.5);

// CORRECT - Account for aspect ratio
float2 uv = position / size;
float aspectRatio = size.x / size.y;
float2 centered = (uv - 0.5) * float2(aspectRatio, 1.0);
float dist = length(centered);
Pitfall 3: Hard Edges
// WRONG - Jagged edges
float circle = step(0.3, dist);

// CORRECT - Smooth edges
float circle = smoothstep(0.29, 0.31, dist);
SwiftUI Integration
For testing your shaders, use this SwiftUI template:
struct ShaderTestView: View {
    var body: some View {
        Rectangle()
            .frame(width: 300, height: 300)
            .visualEffect { content, proxy in
                content.colorEffect(
                    ShaderLibrary.yourShaderName(.float2(proxy.size))
                )
            }
    }
}
Key point: Use visualEffect with proxy.size to pass the actual rendered size to your shader.
Challenges
Challenge 1: Basic Gradients
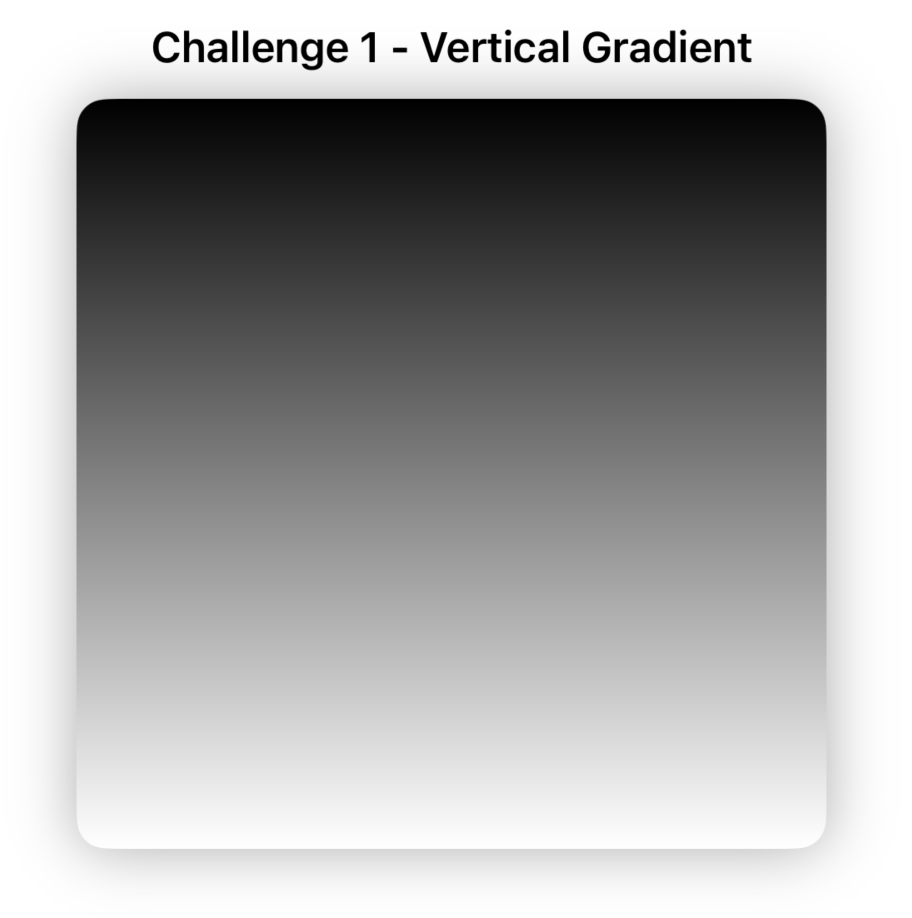

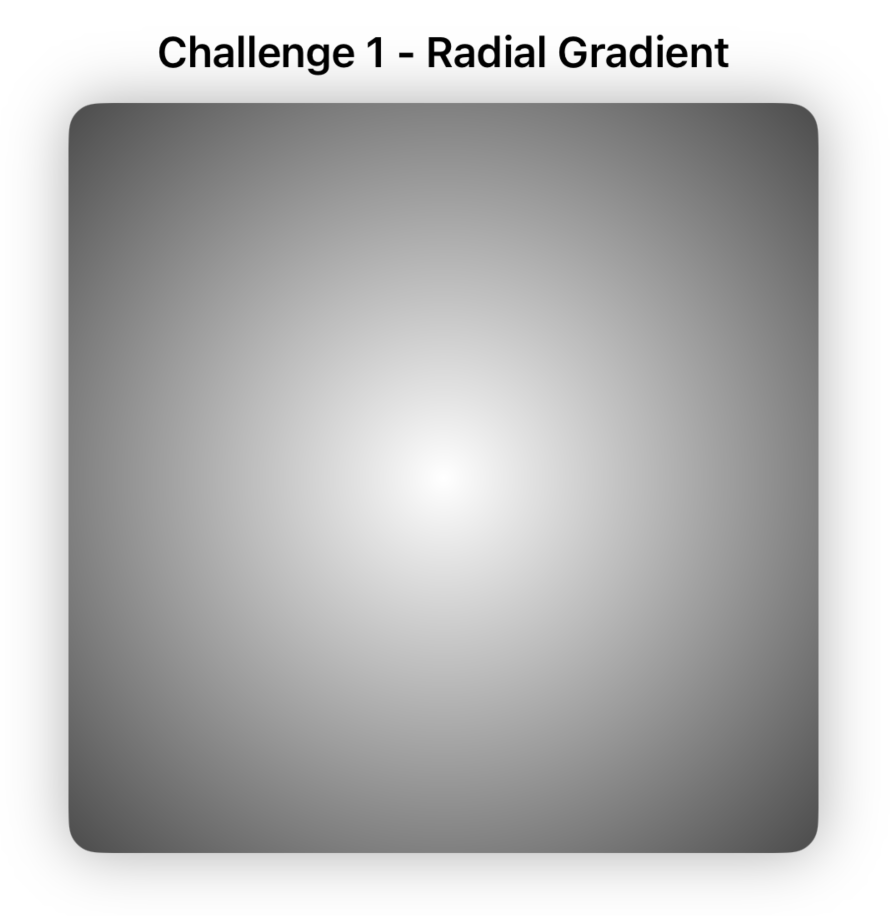
Create three gradient shaders:
verticalGradient: Black at top, white at bottomdiagonalGradient: Gradient from top-left to bottom-rightradialGradient: White center fading to black edges
SwiftUI Test Code:
VStack {
    Rectangle()
        .visualEffect { content, proxy in
            content.colorEffect(ShaderLibrary.verticalGradient(.float2(proxy.size)))
        }
    Rectangle()
        .visualEffect { content, proxy in
            content.colorEffect(ShaderLibrary.diagonalGradient(.float2(proxy.size)))
        }
    Rectangle()
        .visualEffect { content, proxy in
            content.colorEffect(ShaderLibrary.radialGradient(.float2(proxy.size)))
        }
}
.frame(width: 200, height: 200)
Challenge 2: Shape Drawing
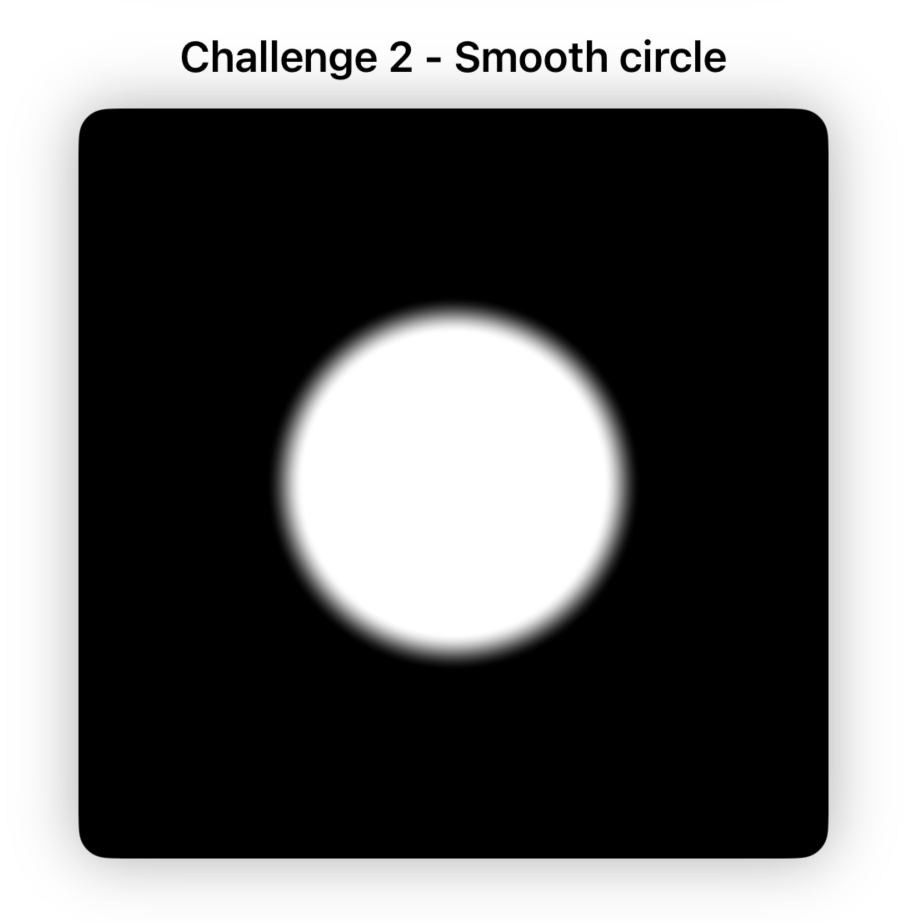

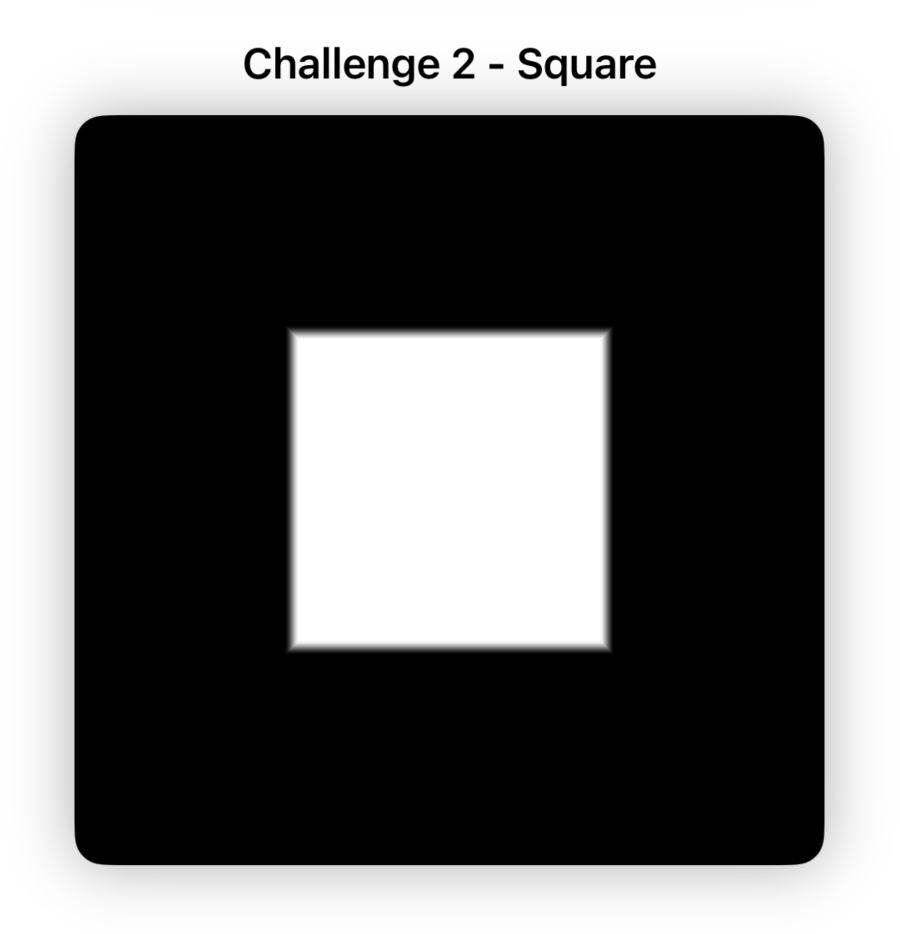
Create these shape shaders:
smoothCircle: Perfect circle with smooth edgesring: Ring shape (circle with hole)square: Square using distance functions
Hint for ring: Use two distance checks - outer and inner radius.
Challenge 3: Pattern Creation
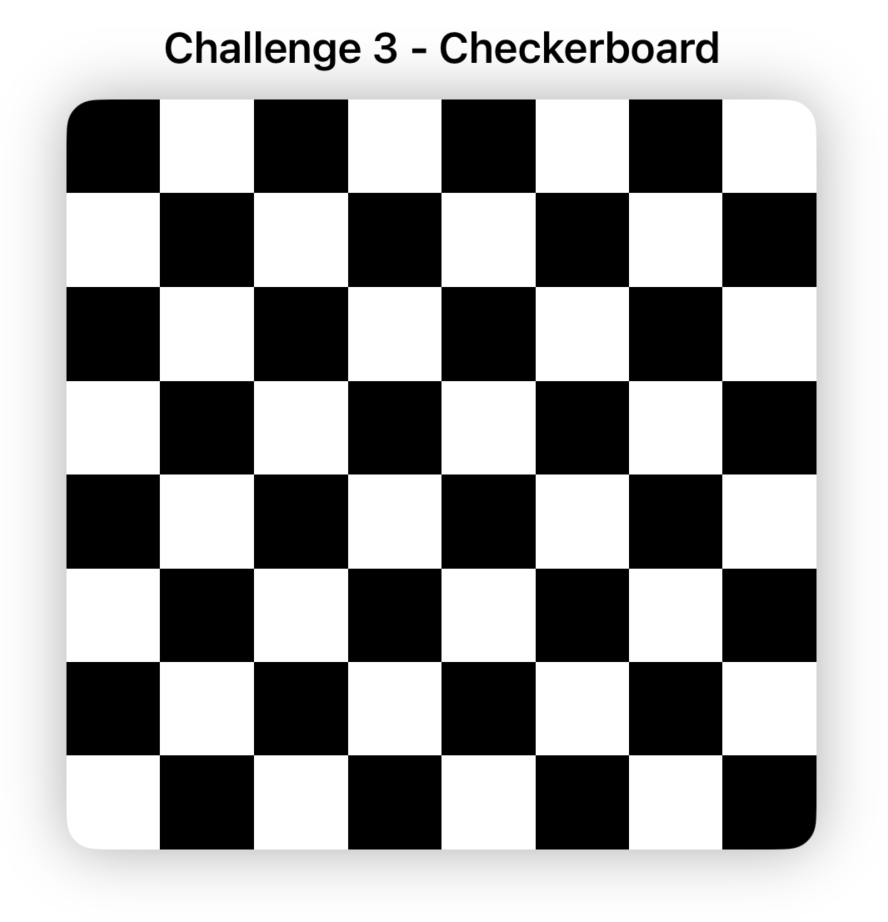
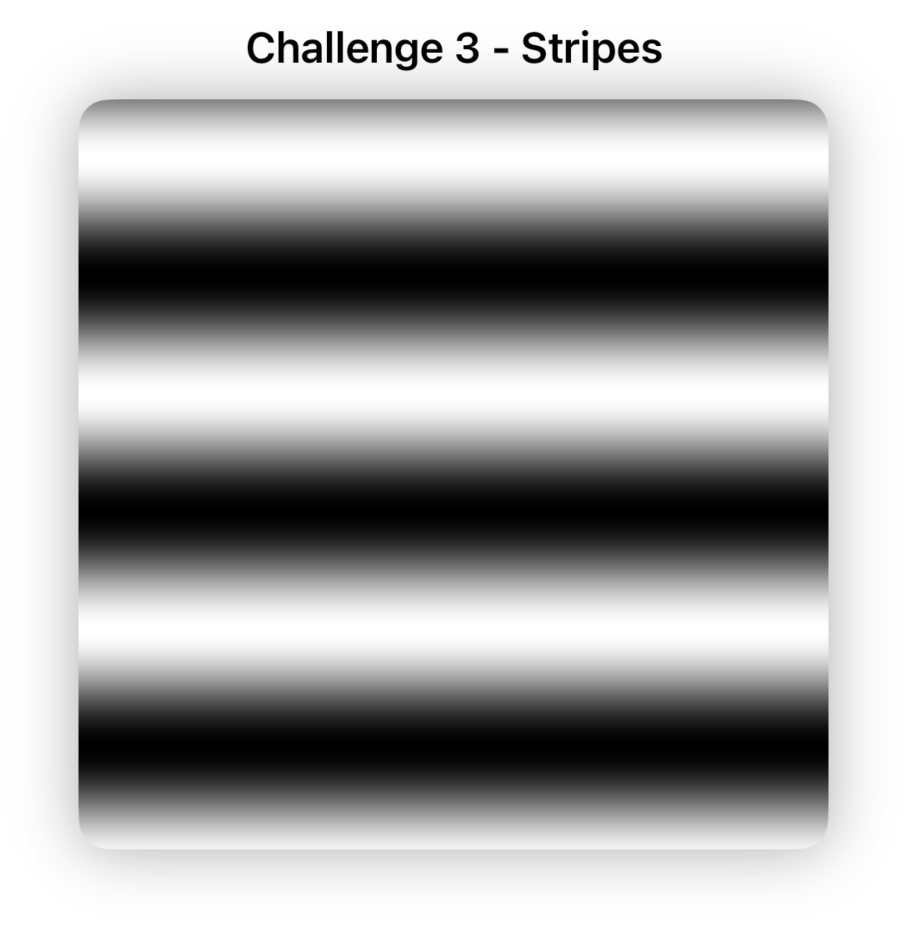
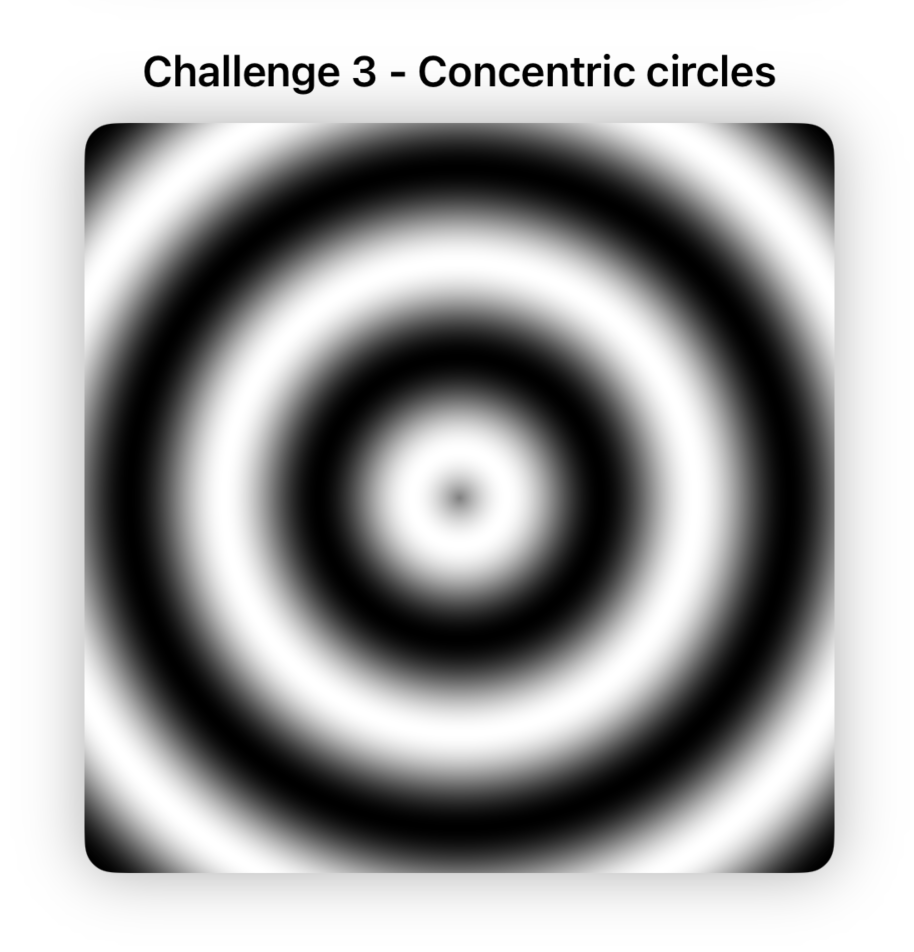
Create these pattern shaders:
checkerboard: 8x8 checkerboard patternstripes: Horizontal stripesconcentricCircles: Multiple circles from center
Hint for checkerboard: Use fract() and step() with grid coordinates.
Challenge 4: Interactive Spotlight
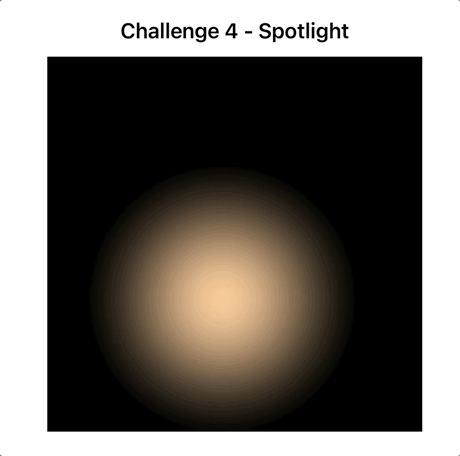
Create spotlight shader that takes a center position parameter:
[[ stitchable ]] half4 spotlight(
    float2 position,
    half4 color,
    float2 size,
    float2 lightCenter  // UV coordinates (0-1)
) {
    // Your code here
}
SwiftUI Integration:
struct SpotlightView: View {
    @State private var lightPos = CGPoint(x: 0.5, y: 0.5)

    var body: some View {
        GeometryReader { geo in
            Rectangle()
                .visualEffect { content, proxy in
                    content.colorEffect(ShaderLibrary.spotlight(
                        .float2(proxy.size),
                        .float2(Float(lightPos.x), Float(lightPos.y))
                    ))
                }
                .gesture(
                    DragGesture().onChanged { value in
                        lightPos = CGPoint(
                            x: value.location.x / geo.size.width,
                            y: value.location.y / geo.size.height
                        )
                    }
                )
        }
        .frame(width: 300, height: 300)
    }
}
Challenge 5: Coordinate Transformations
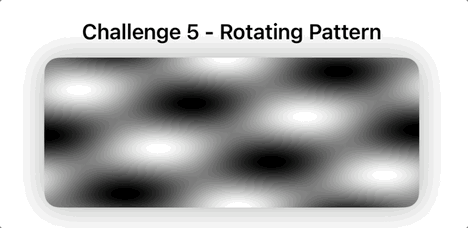
Create rotatingPattern that rotates a pattern over time:
[[ stitchable ]] half4 rotatingPattern(
    float2 position,
    half4 color,
    float2 size,
    float time
) {
    // Rotate coordinates, then create pattern
}
SwiftUI Animation:
struct RotatingPatternView: View {
    @State private var time: Float = 0

    var body: some View {
        Rectangle()
            .visualEffect { content, proxy in
                content.colorEffect(ShaderLibrary.rotatingPattern(
                    .float2(proxy.size),
                    .float(time)
                ))
            }
            .onAppear {
                Timer.scheduledTimer(withTimeInterval: 1/60.0, repeats: true) { _ in
                    time += 1/60.0
                }
            }
    }
}
Want the Challenges Solutions?
Get the full Xcode project with solutions to all challenges, bonus examples, and clean, runnable code.
Get the Full Project →Validation Questions
Before proceeding to Chapter 3:
- What does
position / sizeaccomplish?
Transforms pixel coordinates (0 to width, 0 to height) into UV coordinates (0 to 1, 0 to 1). This creates normalized coordinates that work consistently across different screen sizes, so patterns look the same on iPhone and iPad.
- What are the UV coordinates of the center of any screen?
(0.5, 0.5) - always, regardless of screen size or aspect ratio.
- How do you create a smooth circle edge?
Use smoothstep() instead of hard comparison: smoothstep(0.29, 0.31, dist) creates a smooth transition between the two values, eliminating jagged edges.
- Why use
length(uv - 0.5)for distance from center?
uv - 0.5 centers the coordinate system at (0,0), then length() calculates the Euclidean distance from that centered origin to the current pixel position.
- What's the difference between
step()andsmoothstep()?
step() creates a hard binary transition (0 or 1), while smoothstep() creates a smooth interpolated transition between two threshold values, which prevents aliasing and jagged edges.
Essential Functions to Remember
// Coordinate transformation
float2 uv = position / size;

// Distance from center
float dist = length(uv - 0.5);

// Smooth transitions
float smooth = smoothstep(edge1, edge2, value);

// Grid creation
float2 grid = fract(uv * gridSize);

// Rotation
float2 rotated = float2(
    uv.x * cos(angle) - uv.y * sin(angle),
    uv.x * sin(angle) + uv.y * cos(angle)
);
Next Chapter Preview: You can create patterns and shapes, but they're all grayscale. Chapter 3 reveals how to think about color mathematically - not as "red, green, blue" but as vectors in 3D space that you can rotate, scale, and transform. You'll learn why Instagram filters work and how to create professional color effects.